
:max_bytes(150000):strip_icc():format(webp)/coffeecup-free-html-editor-profile-3467555-8876645f89c444c8b94addcf4307b22d.png)
Quick Steps to Change Weather Location on Apple iPhone 15 Pro | Dr.fone
Quick Steps to Change Weather Location on Apple iPhone 15 Pro
It’s no secret that Weather is not everyone’s go-to app on a daily basis. People only open it when the atmospheric conditions around their area suddenly take an unexpected turn. More often than not, the Weather app remains untouched for a long period of time. But don’t worry. That’s completely understandable. Just remember that if you need to know the latest local forecast, Weather can certainly provide it to you.
You can be sure that the Apple iPhone 15 Pro’s Weather app is a reliable source of meteorological information. It can help you dodge weather disturbances and plan your future activities very well. However, the Weather app may sometimes dispense inaccurate reports if the location settings on your Apple iPhone 15 Pro are misconfigured. Is it a big deal? Actually, not. The internet provides tons of tutorials on how to change the weather location on Apple iPhone 15 Pro. For sure, you can easily restore your preferred location settings in no time.
In this article, we will delve into the main benefits that Apple iPhone 15 Pro’s Weather app offers to users. We will also provide some solutions on how to change weather location on Apple iPhone 15 Pro. Lastly, we will discuss how the Weather app can exactly help us in our daily routine. Continue reading below to learn more.
Part 1. Useful Features of Apple iPhone 15 Pro’s Weather App
In most basic explanation, the Weather app is a tool that helps you determine the weather conditions in certain locations. You can view from there how the weather on a particular day will unfold around the area. It is forecasted at least every hour. If there is a significant development, the report is promptly updated to ensure you receive the latest weather news. Yes. The Apple iPhone 15 Pro’s Weather app continues to serve its purpose even though most users don’t use it that often.
Apart from its well-circulated weather updates, the Apple iPhone 15 Pro’s Weather app has a lot more to offer. Check out the list provided below.
Ten-Day Forecast

Are you planning a particular activity in the coming days? If so, the Ten-Day Forecast feature of Apple iPhone 15 Pro’s Weather app can surely help you in this regard. Basically, it provides estimated predictions on atmospheric conditions, precipitations, and temperature for the next ten days.
Severe Weather Alerts

If an extreme weather disturbance is detected in your area, the Weather app will send you an alert straight away. It can be a weather advisory issued by the state meteorological bureau or a flash report from a credible source. That’s why you should ensure the location settings on your Apple iPhone 15 Pro are well-calibrated. If not, take a moment to reconfigure it. There are lots of tutorials out there on how to change weather location on Apple iPhone 15 Pro. One of them can certainly assist you.
Maps

The Apple iPhone 15 Pro’s Weather app has a map feature that exclusively displays the weather conditions in a specific location. From there, you can view certain atmospheric information, including temperature, precipitation, air quality, and wind conditions. Just make sure that your location is set properly. If you want to replace it, just follow the guide on how to change the weather location on your Apple iPhone 15 Pro.
Air Quality

If information regarding air quality is widely available in your country, it will also show up on the Apple iPhone 15 Pro’s Weather app. You can view from there the recorded air quality index in your area together with a rating if it is good or not. At present, we cannot deny that being aware of the air quality around us is indeed essential. It somehow helps us lessen our exposure to harmful pollutants in the atmosphere. That’s why you should take advantage of this feature. Read the tutorial on how to change the weather location on your Apple iPhone 15 Pro and configure your settings. This way, you’ll stay updated on the air quality of the places you will visit going forward.
Part 2. How to Change Weather Location on Apple iPhone 15 Pro?
We have previously learned that location services play a key role in the accuracy and precision of Apple iPhone 15 Pro’s weather reports. That’s why you need to ensure the location settings on your Apple iPhone 15 Pro are well-configured. Don’t worry. In case it needs a few adjustments, there are lots of techniques on how to change weather location on Apple iPhone 15 Pro. Just choose the best one that perfectly suits your situation. Do you want to try it now? Check out the list of methods provided below.
Method 1: Enter the location into the Weather app’s search bar
Let’s say you just need to check the weather conditions in another location. Can you do it without actually going there? The short answer is yes. The Apple iPhone 15 Pro’s Weather app lets you view meteorological updates from various places by simply searching the location on the platform. Here’s how to do it in easy steps.
- Step 1: Launch the Weather app on your Apple iPhone 15 Pro. If you cannot find the application on your Apple iPhone 15 Pro, try to update your iOS first to the latest version.
- Step 2: Click the Menu icon at the top-left corner of your screen.

- Step 3: Enter your preferred location into the search bar. Find and click it from the suggested results.

- Step 4: Then, click Add. The new location will be then added to the list. If you wish to reorder the list based on your preference, just click the More icon at the top-right corner of the left-side panel screen and then click Edit List. From there, drag the locations up and down to reorganize them to your desired order.

Method 2: Change the Weather app’s primary location on the widget
Do you have a Weather widget on your Apple iPhone 15 Pro’s home screen? If so, you can directly modify the location settings from there. Don’t worry. It’s as easy as shooting fish in a barrel. Here’s how to change the weather location on Apple iPhone 15 Pro from the home screen widget.
- Step 1: Find the weather widget on the home screen of your Apple iPhone 15 Pro. Touch and hold it for a few seconds until the hidden menus appear.
- Step 2: Click Edit Weather.

- Step 3: Click Location. From there, enter your desired location into the search bar and choose one from the suggested results.

- Step 4: The location will be then changed immediately on the widget. If the Edit Weather option is unavailable on your end, try to update your iOS first. The Weather app has just been released recently on Apple iPhone 15 Pro. Therefore, Apple is making changes from time to time.
Method 3: Change weather location on Apple iPhone 15 Pro with Wondershare Dr.Fone.
Is there any other way in case the first two techniques do not bring positive results? Luckily, there is. Wondershare Dr.Fone can absolutely help you with that. It has a potent Virtual Location feature capable of modifying your whereabouts without going outdoors and visiting the actual location. Do you want to try it now? That’s great. Here’s a short guide on how to change weather location on Apple iPhone 15 Pro with the aid of Wondershare Dr.Fone.
- Step 1: Download Wondershare Dr.Fone from its official website. Afterwards, install it on your computer.
- Step 2: Launch the newly installed software on your desktop. Once it fully loads up, connect your Apple iPhone 15 Pro using a data cable. Follow the on-screen instructions to grant the necessary access and ensure the connection between the two devices is stable and reliable.
- Step 3: After that, navigate to the left-side panel and then click Toolbox. Head over to the main dashboard and then click Virtual Location. If it’s your first time using this feature, let Wondeshare Dr.Fone download the additional resources first. Don’t worry. It will not take a long time to complete. Just wait as patiently as you can.
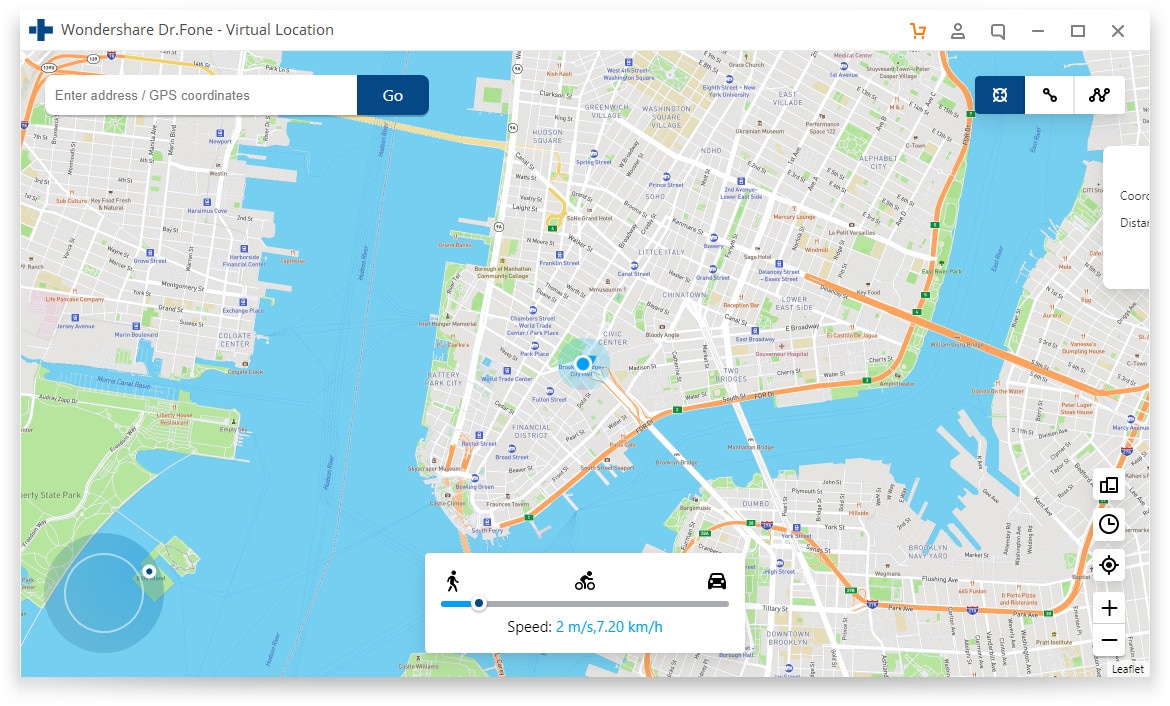
- Step 4: Once the downloading process has concluded, Wondershare Dr.Fone - Virtual Location will immediately open on a separate window. From there, go to the top-right menu bar and then click Teleport Mode. It’s the first icon in the row.

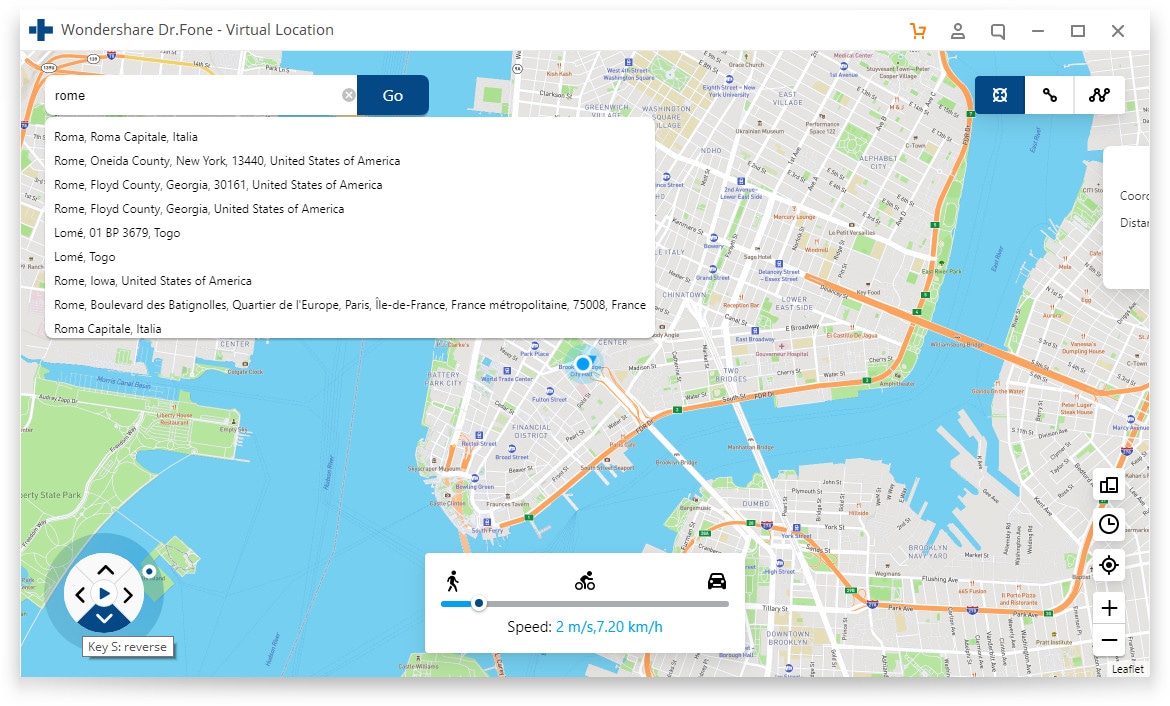
- Step 5: Enter your desired location into the search bar and choose one from the list of suggestions. Right after, click the Enter icon to proceed.

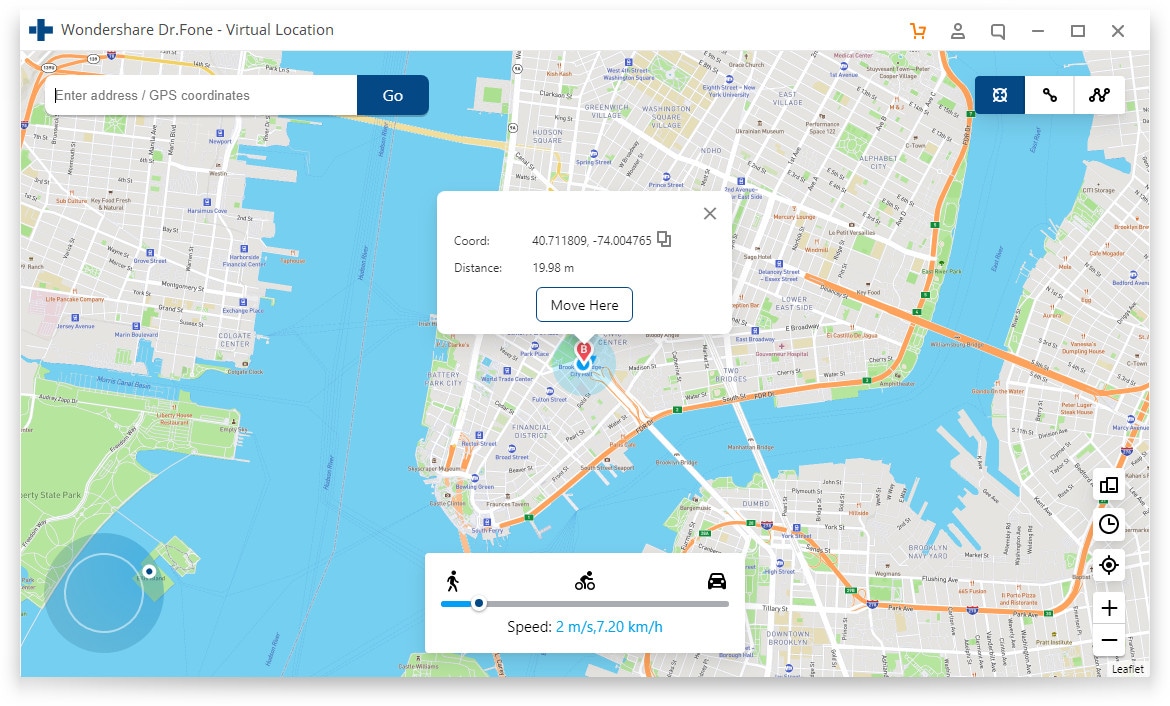
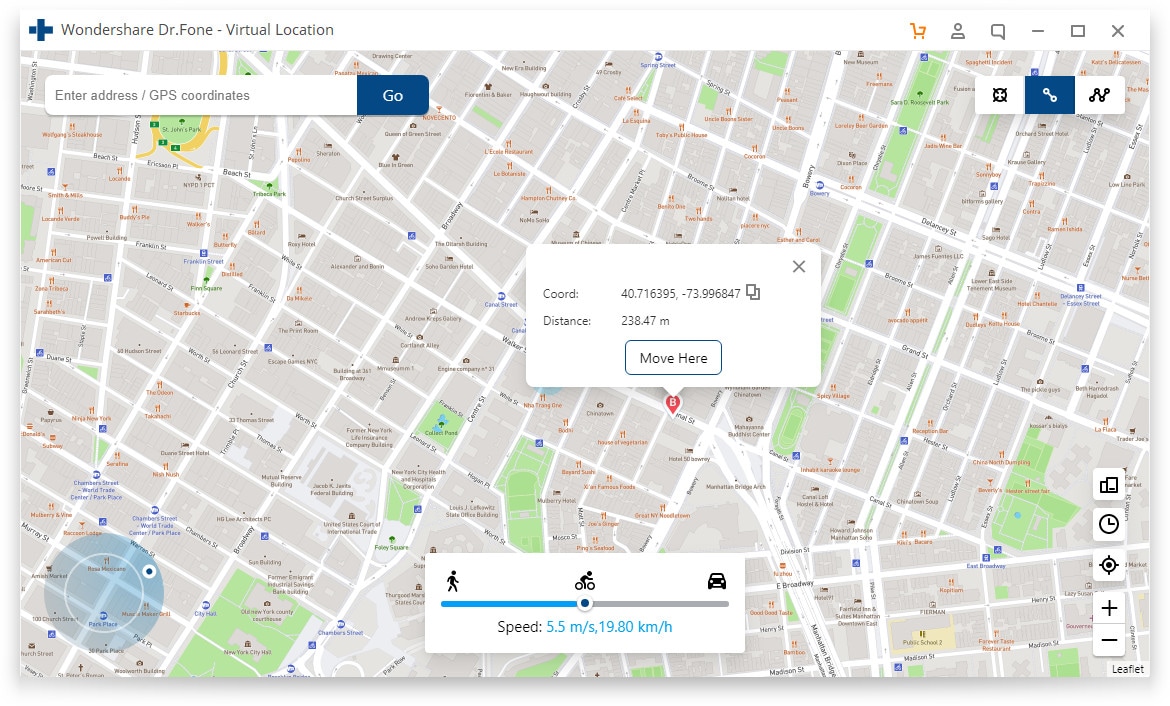
- Step 6: The details pertaining to your selected location will be displayed on the screen. Check them very carefully and confirm that it is the exact location you’re looking for. Once you’re done verifying the details, click the Move Here button below to continue.

- Step 7: In no time, the current location registered on your Apple iPhone 15 Pro will be changed along with your weather location. See? It’s just as simple as that. Therefore, it’s best to use Wondershare Dr.Fone if you wish to change the weather location on your Apple iPhone 15 Pro.
NOTE: If you wish to restore the original location settings of your Apple iPhone 15 Pro, simply disconnect it from the computer and restart it.
Part 3. Is the Weather App on Apple iPhone 15 Pro Really Helpful?
It’s fair to say that Weather is not a primary iOS application. You can continue with your usual routine even without it. However, we cannot deny the fact that it’s there for a reason. All we know for now is that the Weather app helps us stay updated with the latest meteorological forecast. But we don’t know what’s waiting ahead. Maybe the Weather app would soon become a paramount component of an upcoming iOS feature. Is it possible to happen in the future? We’re not sure yet. But one way or another, it’s best to keep Weather up and running on our Apple iPhone 15 Pro.

It doesn’t take much to follow the tutorials above on how to change weather location on Apple iPhone 15 Pro. Most of them can instantly be conducted and finished with just the snap of a finger. That’s why you should regularly calibrate its location settings and make sure that it’s showing appropriate weather reports. Who knows? Keeping tabs on the atmospheric conditions around your local area can help you in a specific way you don’t actually expect. For instance, severe weather alerts are definitely capable of preventing you from running or driving toward a bad storm. Another thing is that the Weather’s Ten-Day Forecast feature can help you organize your weekly schedules accordingly. For sure, Weather has a lot more to offer. Thus, try to explore it once in a while and take advantage of the benefits.
Conclusion
By default, the Apple iPhone 15 Pro’s Weather app uses your current location for updates and reports. You don’t have to do anything if your location settings are configured properly. But just in case you need to change your location for various reasons, you can do it very easily. The tutorials above on how to change weather location on Apple iPhone 15 Pro can surely help you with that. Follow the steps indicated and finish the instructions accordingly. For a more convenient and extremely effective approach, try to download Wondershare Dr.Fone. It offers a powerful Virtual Location feature capable of modifying your whereabouts and simulating GPS movements. Don’t worry. It’s very easy to use. You just have to connect your Apple iPhone 15 Pro to the computer and calibrate the location settings from there. In a minute or two, the location on your device will be then changed according to your choice.
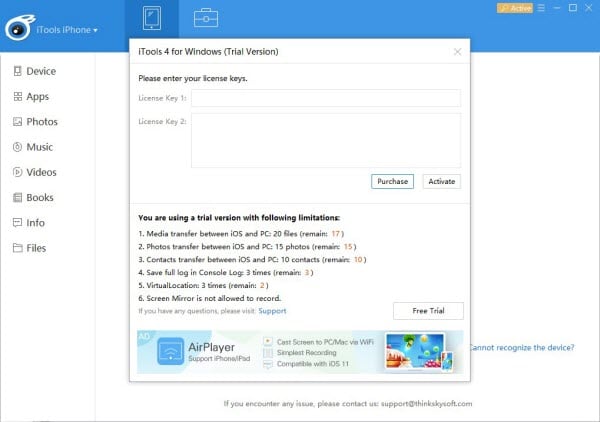
Does iTools virtual location not work On Apple iPhone 15 Pro/iPad?
You must know that iTools virtual location is used worldwide, and it has been reported that there have been many problems. This effective iTools virtual location is a geo-spoofing tool that is mainly for iOS. With this tool, you could easily mock the GPS location, and it also works in an effective manner to access geo-restricted content.
Part 1: Why does my itools not work on Apple iPhone 15 Pro/iPad?
There may be many reasons due to which the iTools virtual location does not work on Apple iPhone 15 Pro/iPad. You must know that iOS 14 is the massive iOS update, but it is the amazing new features that offer a completely new look to your iOS. But iTools not working on Apple iPhone 15 Pro/iPad could make it difficult for the user to use this tool.
With the introduction of the iTools virtual location, many people have been complaining about the issues they are facing using this tool. Some of the common issues are getting stuck in the developer mode, iTools not downloading, Map crash, iTools fail to work, location won’t move, image load failed, and much more. All these issues are making the use of iTools more difficult for the user to use.
Usually the reasons lie with bad internet, Wi-Fi or outdated version of the tool. Let us know in the following section how you can deal with various issues that lead to iTools not working on Apple iPhone 15 Pro/iPad.
Part 2: Ways to fix the iTools not work on Apple iPhone 15 Pro/iPad
iTools Virtual Location is the perfect tool that helps you to spoof location effectively. But there are many iTools not working problems that you may encounter in these tools some of them are like as mentioned below:
1. Stuck in developer mode
This problem is the most common issue that people mainly face with the iTools virtual Location. When you are stuck in the developer mode, you may notice that the application won’t initiate, and it also stops your navigation to the next step. This can be triggered if your iTools is not in the updated version. And hence, in order to resolve this problem, you may update the latest version of iTools on the official website.
2. iTools map not showing
Many of the people are also facing a problem like they cannot see the map while using a particular tool. This problem may be due to an unstable internet connection. Hence you must check with the internet connection to resolve the problem. Or you may also restart the tool and initiate the geo spoofing process.
There are also different ways or you can say some basic ways to go along with whenever iTools doesn’t work. You must know these basic tips when you stuck with such issue with your iOS 14. These are mentioned below:
Step 1: iTools download ios 14 must be of the latest iTools virtual location from the official website.
Step 2: Get a stable internet connection for running the geo spoofing.
Step 3: Restart the tool if you are stuck in any step or the application crash.
Step 4: Keep the tool updated for effective use.
The above mentioned are some of the steps you must follow to avoid any problem while using the iTools on Apple iPhone 15 Pro/iPad.
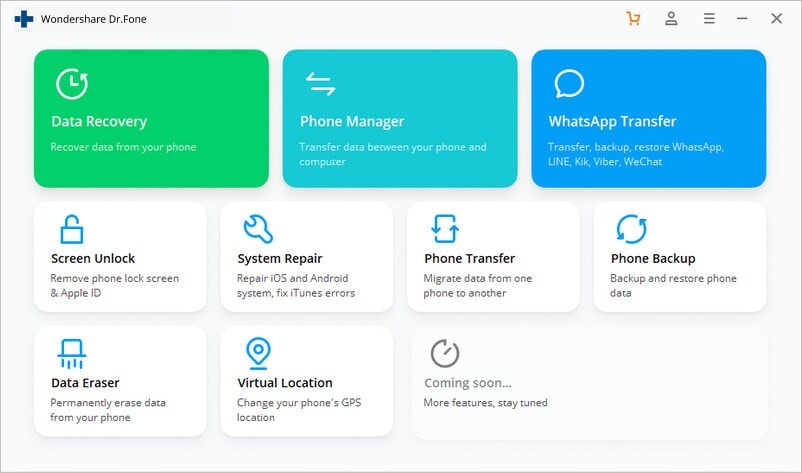
Part 3: Better alternative for iTools virtual location
Dr.Fone Virtual Location (iOS) is an effective and popular tool that could be easily used to change your GPS location to any place you want to change. With this popular tool, you could set any location anywhere in the world by creating a virtual location on iOS. It is the perfect tool that helps you to fake or spoof your location. The best thing about this software is that it is free and safe to use. And with its attractive features, you would love to browse and fake your Apple iPhone 15 Pro’s real-time location.
Key Features
Some of the key features of Dr.Fone – Virtual Location (iOS) that is making is popular all over the globe are mentioned below:
- It helps you to teleport iPhone GPS to anywhere in the world easily and quickly.
- It is the perfect solution to simulate GPS movement along real roads or paths you draw.
- With the help of the joystick, you could easily make the movement of the GPS freely.
- It is the best tool that supports five devices of location management that too in a perfect manner.
Step by Step Tutorial
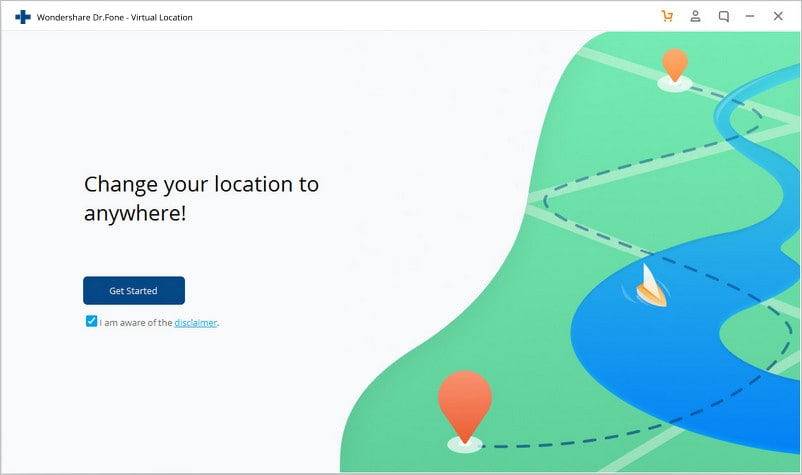
If you want to know how to use the Dr.Fone – Virtual Location (iOS) to fake Location, then do not worry. Here you could get some of the simple tips to use Dr.Fone – Virtual Location (iOS) to fake your location using “Teleport” mode. With only three steps, you could easily change the GPS location on your Apple iPhone 15 Pro. The simple steps are mentioned below:
Step 1: Launch the program on your computer
The first step you need to do to use the program is to download and install it from the official website. You must click on the “Virtual Location” from all the options.
Now, have your phone connected to your computer. Then click on the “Get Started” option.
Step 2: Find your actual location on your map
In the second step, you need to find your actual location on your map in the new window. Check that the location is accurately displayed or not. If in case the location is not accurately displayed, then click the Centre On icon. You may find the Centre On icon in the lower right part to show the accurate location.
Step 3: Activate the teleport mode
Now, you need to activate the teleport mode by clicking the corresponding icon. You may find the corresponding icon in the upper right corner, and then you need to enter the place that you want to teleport in the upper left field and then click on the “Go” option.
Step 4: Click on the Move Here option
Now you may notice that the system would be able to understand your desired location. Hence click on the popup box of “Move Here.”
Step 5: The location will display on the program and app
In the last step, click the Centre On option. You will find that your location changes and is displaying on the program and app.
Conclusion
iTools ios 14 is designed as a powerful file management tool for all iPhones. Also, it is a greta choice to get your location spoofed on your Apple iPhone 15 Pro. But still, there are many virtual location issues that can break your comfort and lead you to disappointment. However, the problem can be effectively resolved with the help of Dr.Fone – Virtual Location (iOS) as it is the best alternative to iTools. Hence, use this perfect tool to resolve your iTools not work with ios 14 in the best possible manner.
How to View GPX Files: Online and Offline Solutions Of Apple iPhone 15 Pro
Also known as GPS Exchange Format, GPX is one of the most resourceful file types that is used to store and import/export map-related data. Ideally, a lot of people use GPX files to access a particular route offline when they are off the grid. Though, there are times when users find it hard to view GPX on a map. Don’t worry, there are plenty of ways to view GPX online or offline. In this post, I will let you know how to view GPX in Google Maps and other resourceful desktop applications in detail.
Part 1: What Can you Do with GPX Files?
Before we discuss how to utilize a GPX view online or offline tool, let’s quickly consider how these files work. It stands for GPS Exchange format and stores map-related data in an XML format. Apart from XML, KML and KMZ are other common file formats to store GPX data.
From the exact coordinates of places to their routes, a GPX file would contain the following information:
- Coordinates: Also know as waypoints, a GPX file would contain details about longitude and latitude that are needed to be covered on the map.
- Routes: The main reason for using GPX files is that they store detailed routing information (the path that we need to take to reach from one point to another).
- Tracks: A track consists of various points that we are merged to form the route or the path.

Let’s suppose you have devised a route between two points that you would need later on. You can now export the GPX file from the application and even import it to the same or another application. When you use the GPX viewer, it will let you access the route offline without an active internet connection. That’s why GPX files are used to view a route offline while hiking, trekking, cycling, and do other offline activities.
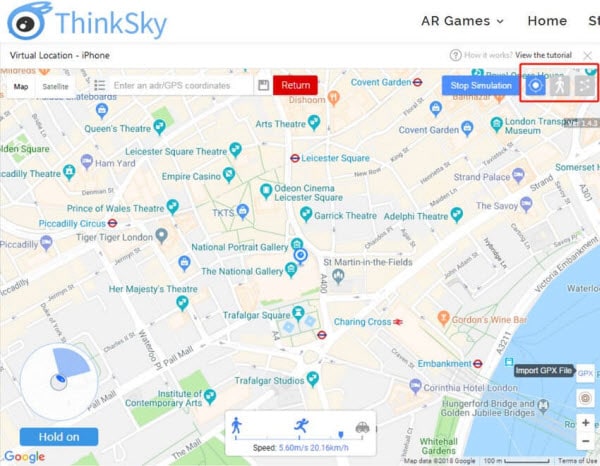
Part 2: How to View GPX Files Online in Google Maps?
The good thing is that there are tons of options to view GPX online on desktop, Android, or iOS platforms. Some of these freely available solutions to view GPX on Map are Google Earth, Google Maps, Bing Maps, Garmin BaseCamp, GPX Viewer, and so on.
Out of them, Google Maps is one of the most used solutions to view GPX online on smartphones and desktops alike. As of now, you can import GPX files in the KML format or even load CSV files of exact coordinates on Google Maps. To learn how to view GPX in Google Maps, follow these steps:
Step 1: Go to Your Places in Google Maps
To view GPX on the map, you can first head to the official website of Google Maps on your computer. Now, just click on the hamburger (three-line) icon from the top-left corner to access its options.

This will display various options related to your Google Maps account. From here, you can just click on the “Your Places” feature.

Step 2: Choose to Create a New Map
As a dedicated section of “Your Places” would be launched, you can view all the saved places for your Google Maps account. Here, you can go to the “Maps” tab to view the existing saved route and spots. Since you have to view GPX in Google Maps, you can click on the “Create Map” option from the bottom to load a new map.

Step 3: Import and View the GPX File Online
This will make Google Maps load a new page that will let you create a fresh map as per your preferences. Here, you can just click on the “Import” button to load a browser window from where you can directly load a GPX file on Google Maps and make it available offline as well.

Part 3: How to View a GPX File Offline with Dr.Fone – Virtual Location?
Besides Google Maps, you can also take the assistance of Dr.Fone – Virtual Location to view GPX files on your computers offline. Since it is a desktop tool, it would let you load any GPX file without being connected to an active internet connection. Besides that, the application can also be used to spoof the location of your iOS device or simulate its movement in a route without jailbreaking it.
Therefore, if you want, you can first simulate the movement of your device and export the GPX file. Later, you can import the saved GPX file and simulate your Apple iPhone 15 Pro movement in the same route without any trouble.
Step 1: Launch Dr.Fone – Virtual Location and connect your Apple iPhone 15 Pro
At first, you can just connect your Apple iPhone 15 Pro using a working lightning cable and launch the Dr.Fone – Virtual Location application. Once your device is detected, just click on the “Get Started” and agree to its terms and conditions.

Step 2: Simulate the Movement of your Apple iPhone 15 Pro
The application would automatically detect your Apple iPhone 15 Pro on the interface with its present location. To simulate its movement, you can click on the Multi-stop or One-stop Mode icons from the top.

You can now drop the pin in a route on the map and click on the “Move Here” Button to start simulating the movement.

Subsequently, you can select the number of times you want to cover the route and click on the “March” button. The application will even let you select a preferred speed for the movement.

Step 3: Export or Import the GPX Files
Once you have loaded the map on the interface, you can easily save it offline as a GPX file. To do that, just click on the Export icon from the floating menu on the side.

Similarly, you can also import a GPX file directly to the Dr.Fone application. To do this, you just have to click on the “Import” icon from the sidebar. This will open a browser window, letting you go to a location on your computer where the GPX file is saved.

Once the GPX file is loaded, you can simply wait for a while and let the application process it without closing it in between.

As you can see, it is pretty easy to view GPX online or offline using the right tools. In this post, I have included a detailed guide on how to view GPX in Google Maps. Besides that, I have also included another solution to view GPX on a map using Dr.Fone - Virtual Location (iOS). Apart from importing/exporting GPX files, the application can also be used to spoof your Apple iPhone 15 Pro’s location or simulate its movement virtually from anywhere you want.
Also read:
- In 2024, Does iTools virtual location not work On Apple iPhone SE (2022)/iPad? | Dr.fone
- In 2024, 6 Methods to Protect Yourself from Location Tracking on Apple iPhone 13 mini | Dr.fone
- How to Enable, Disable, and Change Safari Location on Apple iPhone XS Max | Dr.fone
- In 2024, How to See Someones Location on Apple iPhone 6 Plus | Dr.fone
- How to See Someones Location on Apple iPhone 15 Plus | Dr.fone
- Find My App Troubleshooting No Location Found vs. Location Not Available & How to Fix Them On Apple iPhone XR | Dr.fone
- In 2024, 3 Smart and Simple Ways to Change Home Address on Apple iPhone 13 Pro Max | Dr.fone
- In 2024, Quick Steps to Change Weather Location on Apple iPhone SE | Dr.fone
- In 2024, Quick Steps to Change Weather Location on Apple iPhone 11 | Dr.fone
- Hide location on Apple iPhone 6s and Android without others knowing | Dr.fone
- In 2024, Does iTools virtual location not work On Apple iPhone 11/iPad? | Dr.fone
- In 2024, How to Enable, Disable, and Change Safari Location on Apple iPhone 15 Pro Max | Dr.fone
- A Full Review for iTools Virtual Location and Top 5 Alternatives For Apple iPhone 11 Pro/iPad | Dr.fone
- In 2024, Does PokeGo++ still work on Apple iPhone 15 Pro Max/iPad? | Dr.fone
- 5 Ways Change Your Home Address in Google/Apple Map on Apple iPhone SE (2022)/iPad | Dr.fone
- Does iTools virtual location not work On Apple iPhone 15 Plus/iPad? | Dr.fone
- How to Fix the Apple iPhone 7 Plus GPS not Working Issue | Dr.fone
- In 2024, Does iTools virtual location not work On Apple iPhone 8/iPad? | Dr.fone
- In 2024, Hide location on Apple iPhone 6 and Android without others knowing | Dr.fone
- Does PokeGo++ still work on Apple iPhone SE (2022)/iPad? | Dr.fone
- How to Fix the Apple iPhone 6 GPS not Working Issue | Dr.fone
- In 2024, A Full Review for iTools Virtual Location and Top 5 Alternatives For Apple iPhone 15 Pro Max/iPad | Dr.fone
- Double Location Dongle All to Know About Apple iPhone 14 Pro/iPad GPS Spoofing | Dr.fone
- 6 Methods to Protect Yourself from Location Tracking on Apple iPhone 11 Pro | Dr.fone
- In 2024, 3 Smart and Simple Ways to Change Home Address on Apple iPhone 7 | Dr.fone
- Hide location on Apple iPhone 7 Plus and Android without others knowing | Dr.fone
- Quick Steps to Change Weather Location on Apple iPhone 11 Pro | Dr.fone
- 6 Methods to Protect Yourself from Location Tracking on Apple iPhone XR | Dr.fone
- How to See Someones Location on Apple iPhone 7 | Dr.fone
- In 2024, Double Location Dongle All to Know About Apple iPhone 15 Plus/iPad GPS Spoofing | Dr.fone
- 4 Effective Methods Fake GPS Location on Apple iPhone 12 mini/iPad | Dr.fone
- Quick Steps to Change Weather Location on Apple iPhone 6s Plus | Dr.fone
- In 2024, 3 Smart and Simple Ways to Change Home Address on Apple iPhone 6s | Dr.fone
- 7 Fixes to No GPS - Showing Approximate Location on Apple iPhone SE Waze | Dr.fone
- How to Change Your Location on Apple iPhone 11 | Dr.fone
- In 2024, Find My App Troubleshooting No Location Found vs. Location Not Available & How to Fix Them On Apple iPhone 12 Pro Max | Dr.fone
- In 2024, 3 Smart and Simple Ways to Change Home Address on Apple iPhone 6 Plus | Dr.fone
- Does PokeGo++ still work on Apple iPhone SE (2020)/iPad? | Dr.fone
- In 2024, How to See Someones Location on Apple iPhone 14 Plus | Dr.fone
- In 2024, 5 Ways Change Your Home Address in Google/Apple Map on Apple iPhone XS Max/iPad | Dr.fone
- How to See Someones Location on Apple iPhone 12 Pro | Dr.fone
- In 2024, How to See Someones Location on Apple iPhone XR | Dr.fone
- 6 Methods to Protect Yourself from Location Tracking on Apple iPhone 15 Plus | Dr.fone
- In 2024, Quick Steps to Change Weather Location on Apple iPhone XR | Dr.fone
- In 2024, 5 Ways Change Your Home Address in Google/Apple Map on Apple iPhone 11/iPad | Dr.fone
- In 2024, Double Location Dongle All to Know About Apple iPhone 12/iPad GPS Spoofing | Dr.fone
- In 2024, How to See Someones Location on Apple iPhone 15 Pro | Dr.fone
- Does iTools virtual location not work On Apple iPhone 14/iPad? | Dr.fone
- How to recover deleted photos on Moto G Stylus 5G (2023)
- How To Track IMEI Number Of Oppo Reno 11 Pro 5G Through Google Earth?
- In 2024, How to Share/Fake Location on WhatsApp for Huawei P60 | Dr.fone
- In 2024, 5 Ways to Move Contacts From HTC U23 to iPhone (13/14/15) | Dr.fone
- How to recover deleted photos from Android Gallery after format on Itel P55T
- In 2024, 10 Free Location Spoofers to Fake GPS Location on your Xiaomi Mix Fold 3 | Dr.fone
- In 2024, How to Unlock Nokia C12 Pro Phone Password Without Factory Reset?
- In 2024, How To Unlock Vivo Y77t Phone Without Password?
- How to Remove a Previously Synced Google Account from Your ZTE Nubia Flip 5G
- In 2024, Effective Ways To Fix Checkra1n Error 31 From iPhone 7
- In 2024, A Perfect Guide To Remove or Disable Google Smart Lock On Oppo Reno 11 5G
- How To Change Infinix Note 30 Pro Lock Screen Password?
- Title: Quick Steps to Change Weather Location on Apple iPhone 15 Pro | Dr.fone
- Author: Isabella
- Created at : 2024-05-19 02:40:11
- Updated at : 2024-05-20 02:40:11
- Link: https://iphone-location.techidaily.com/quick-steps-to-change-weather-location-on-apple-iphone-15-pro-drfone-by-drfone-virtual-ios/
- License: This work is licensed under CC BY-NC-SA 4.0.
